
Having just spent what felt like weeks waiting for a sweater to dry after blocking in a cold, damp house, I decided there must be a better way than drying them flat - especially when they need a bit of stretching in particular direction.
I subsequently discovered that you can get such a thing as a woolly board or sweater board - a kind of wooden frame to block a sweater on - however such things are expensive and hard to find! So I set out to make my own, and thought I’d post some clear instructions, since the pictures and directions online are all a bit vague in places.
Materials
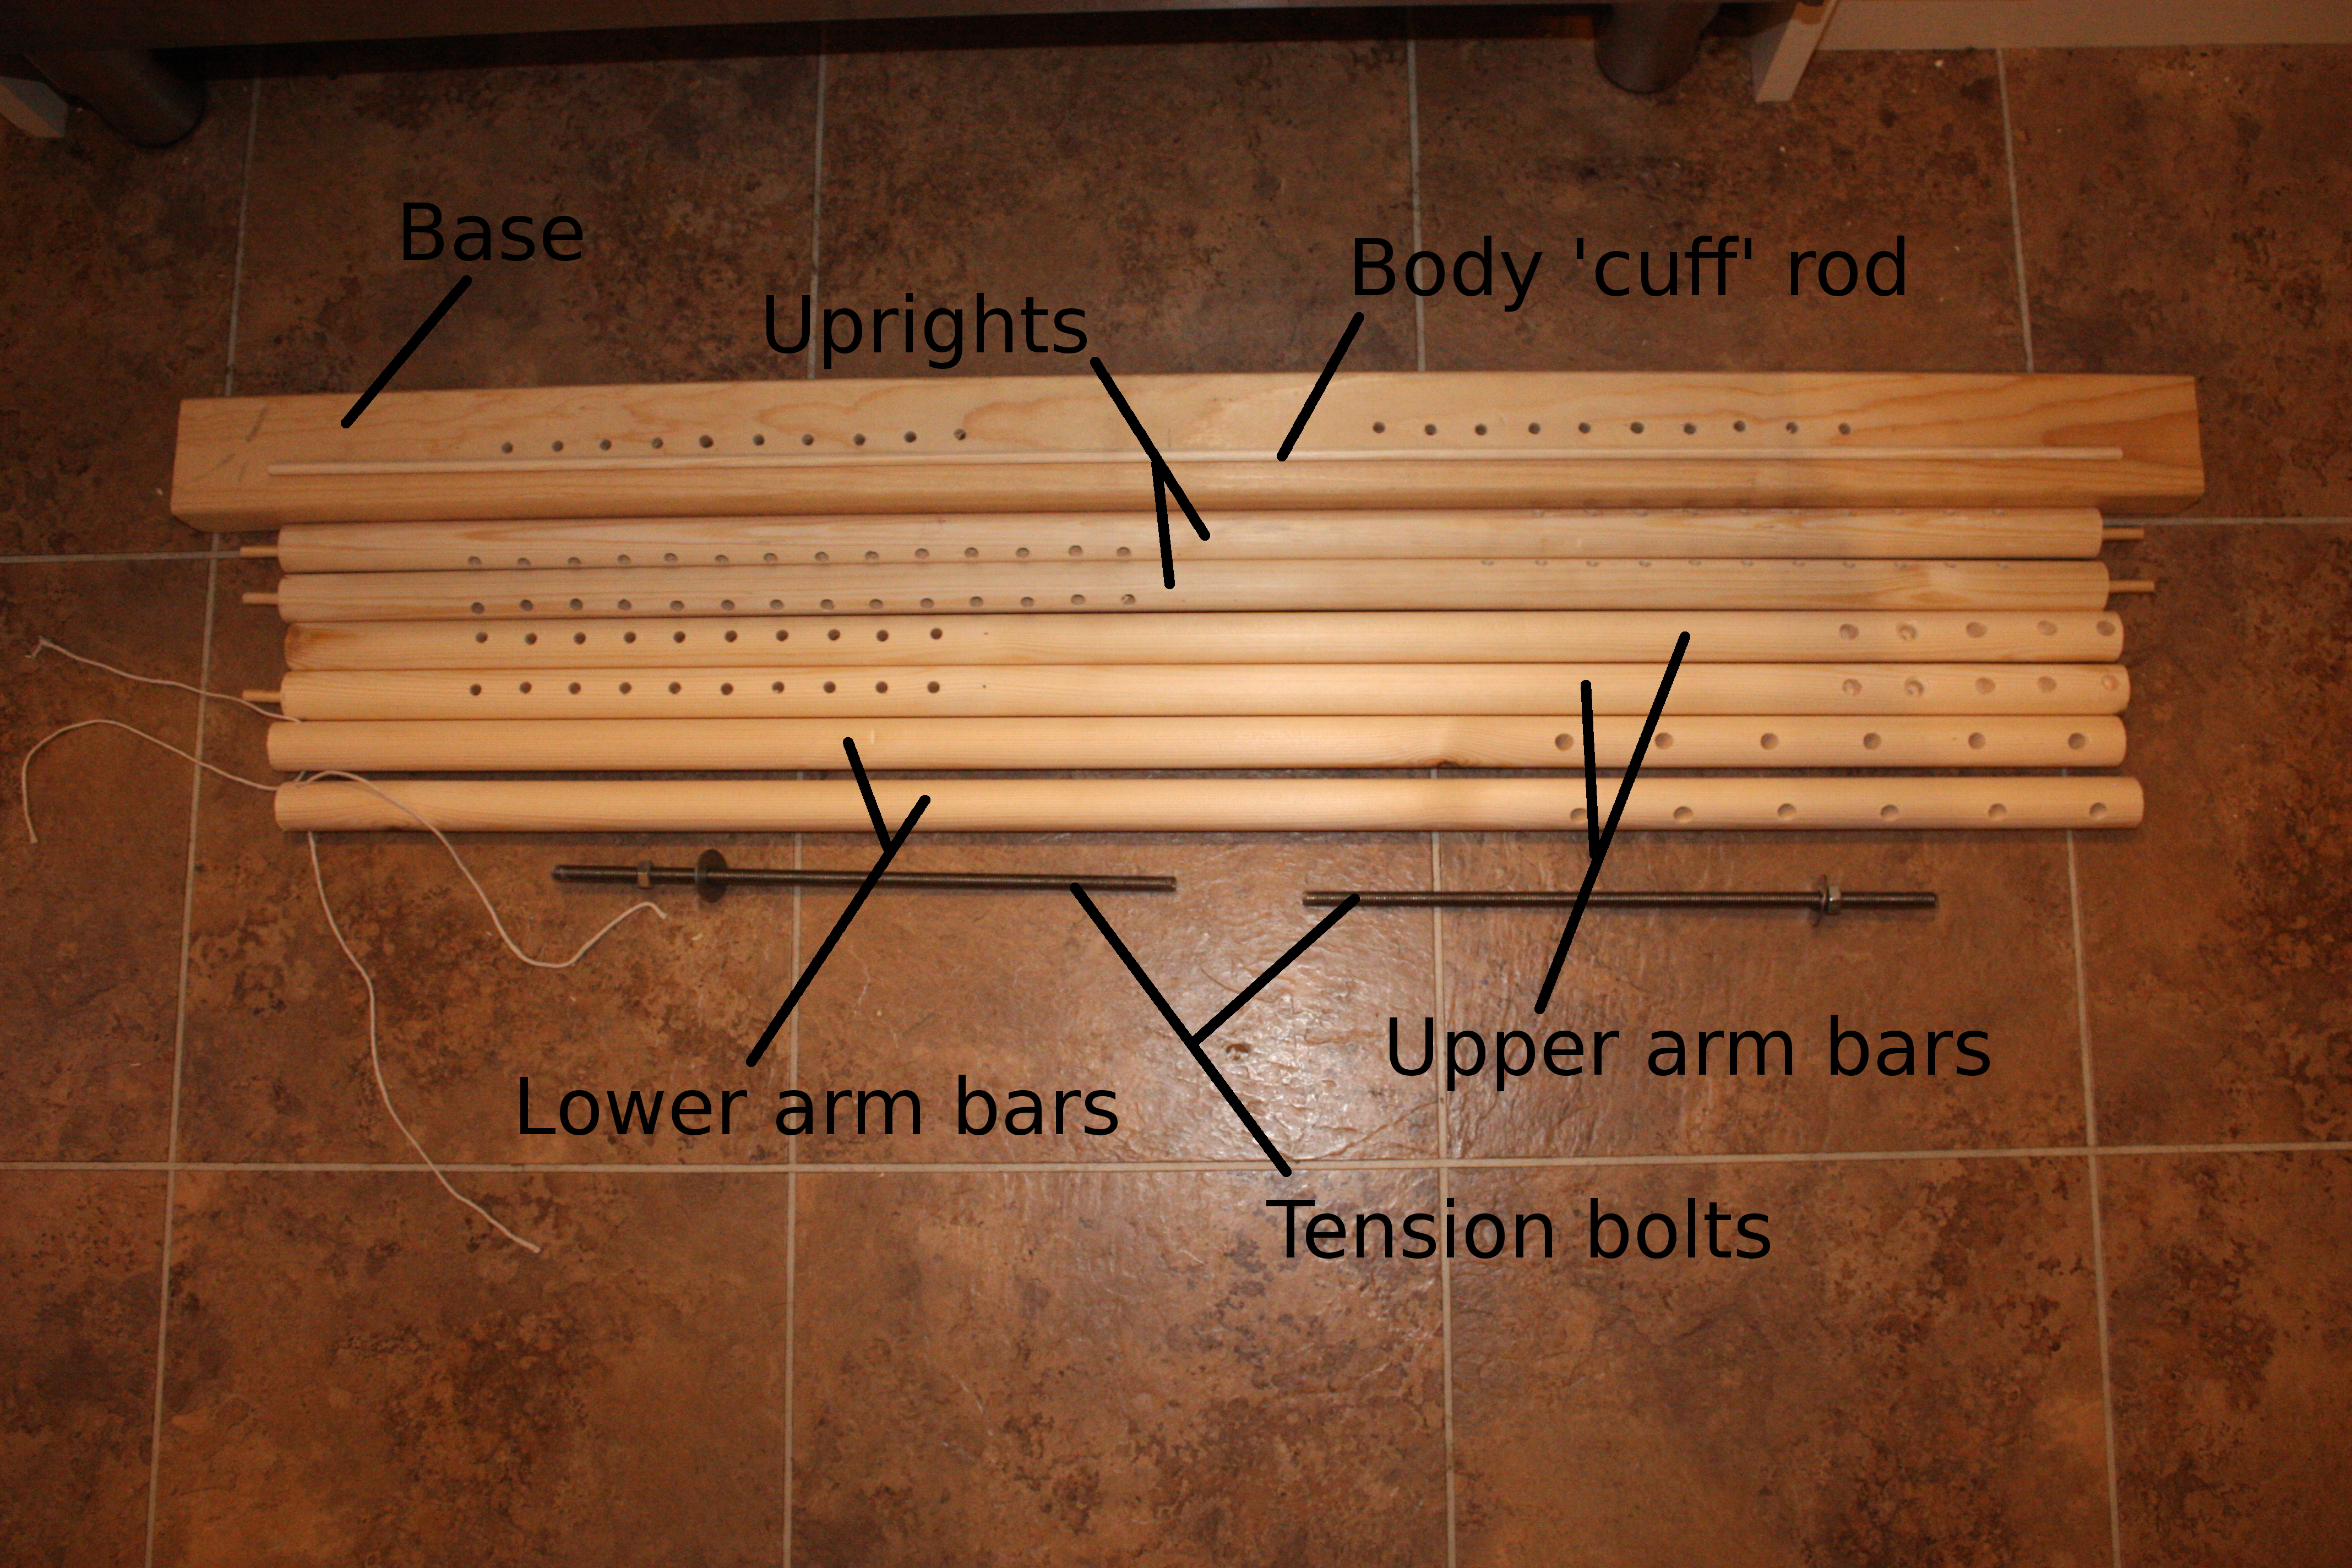
- 6 rods (broom handles or equivalent will do): 90cm long, 25mm in diameter - for uprights and lower and upper arm bars.
- 1 dowelling piece: 90cm long, 6mm diameter - to make the bottom bar to pin the sweater body cuff to.
- 1 piece of scrap wood - at least 90cm long, and 3cm thick, of any width, to make a base/stand.
- 2 long (25cm or more) stainless steel M6 (6mm) bolts or threaded rods.
- 5 pieces metal rod: each 5cm long, 6mm diameter - for dowel pegs. You should have spare 6mm threaded rod or bolts which can be cut down to length with a hacksaw.
- 2 washers to fit thread (also stainless steel).
- 2 nuts to fit thread (also stainless steel).
- String or flexible wire.
You will also need a drill with 6 and 7mm wood drill bits.
(Note - I initially started with wooden dowel pegs - which can be seen in the pictures. However these are very fragile and snap easily, so I updated to using 6mm metal dowel pegs instead).
Instructions
Preparation
- Sand the end of the rods well, taking off the corners entirely, to prevent catching on the knitted item later.
- Prepare the metal rod by cutting into 5cm pieces with a hacksaw.
Uprights
- Take 2 of the 90cm rods, drill a 6mm diameter, 2.5cm deep hole into each end, and insert dowel pegs. These are to pin it to the upper arm and base.
- Drill 10 7mm diameter holes through each upright, centred 2.5cm apart, starting 10cm from the bottom end of the upright. This is to fit the horizontal bar to pin the body cuff.
- Rotate the rod 90 degrees, now drill 10 6mm diameter holes, starting 10cm from the top end of the upright. This is to tie the lower arm bars through.
Upper Arm Bar
- Take 2 of the 90cm rods, drill a 6mm diameter, 2.5cm deep hole into one end of each rod. Insert a dowel peg into one of the ends. This allows these rods to be pinned together.
- On the side of each rod, starting at the ‘join’ end, drill 10 6mm diameter holes, centred 2.5cm apart, starting 10cm out from the join end. This is for the uprights to connect to.
- Drill 3 or 4 7mm dimples, 5cm apart starting at the outer end of each bar, on the same side as the upright holes. This is to slot the tension bolt into.
Base
- Mark the centre point lengthwise on the bar.
- Drill 10 6mm diameter holes on each side of this mark, starting 10cm out from the mark. These holes match those on the upper arm bar, for the bottom of the uprights to connect to.
Lower Arm Bar
- Take 2 of the 90cm rods, drill a 6mm diameter hole through one end of each. This is to thread the string to tie to the uprights.
- At the other end, rotate the rod through 90 degrees, and drill 5 or 6 6mm hole through the rod at around 25-30 degrees (leaning the drill is enough, it doesn’t need to be exact!), angled towards the body. This is for the tension bolts.
Finishing Up
- Thread string through the inner holes of the lower arm bars.
- Thread the bolts through the lower arms, with the washer and nut on top. The nut doesn’t tighten anything - it’s just there to stop the bolt falling out when not under tension. We’re using stainless steel fittings as they’re likely to get damp from the sweater, and we don’t want anything to rust. If you can’t get stainless fittings, then wooden dowels with some kind of rust-proof pin in place of the washer could work.
- Make sure to sand down all the wood after drilling, to remove any snags and burrs. You don’t want the woolly board catching on your sweater and pulling it!
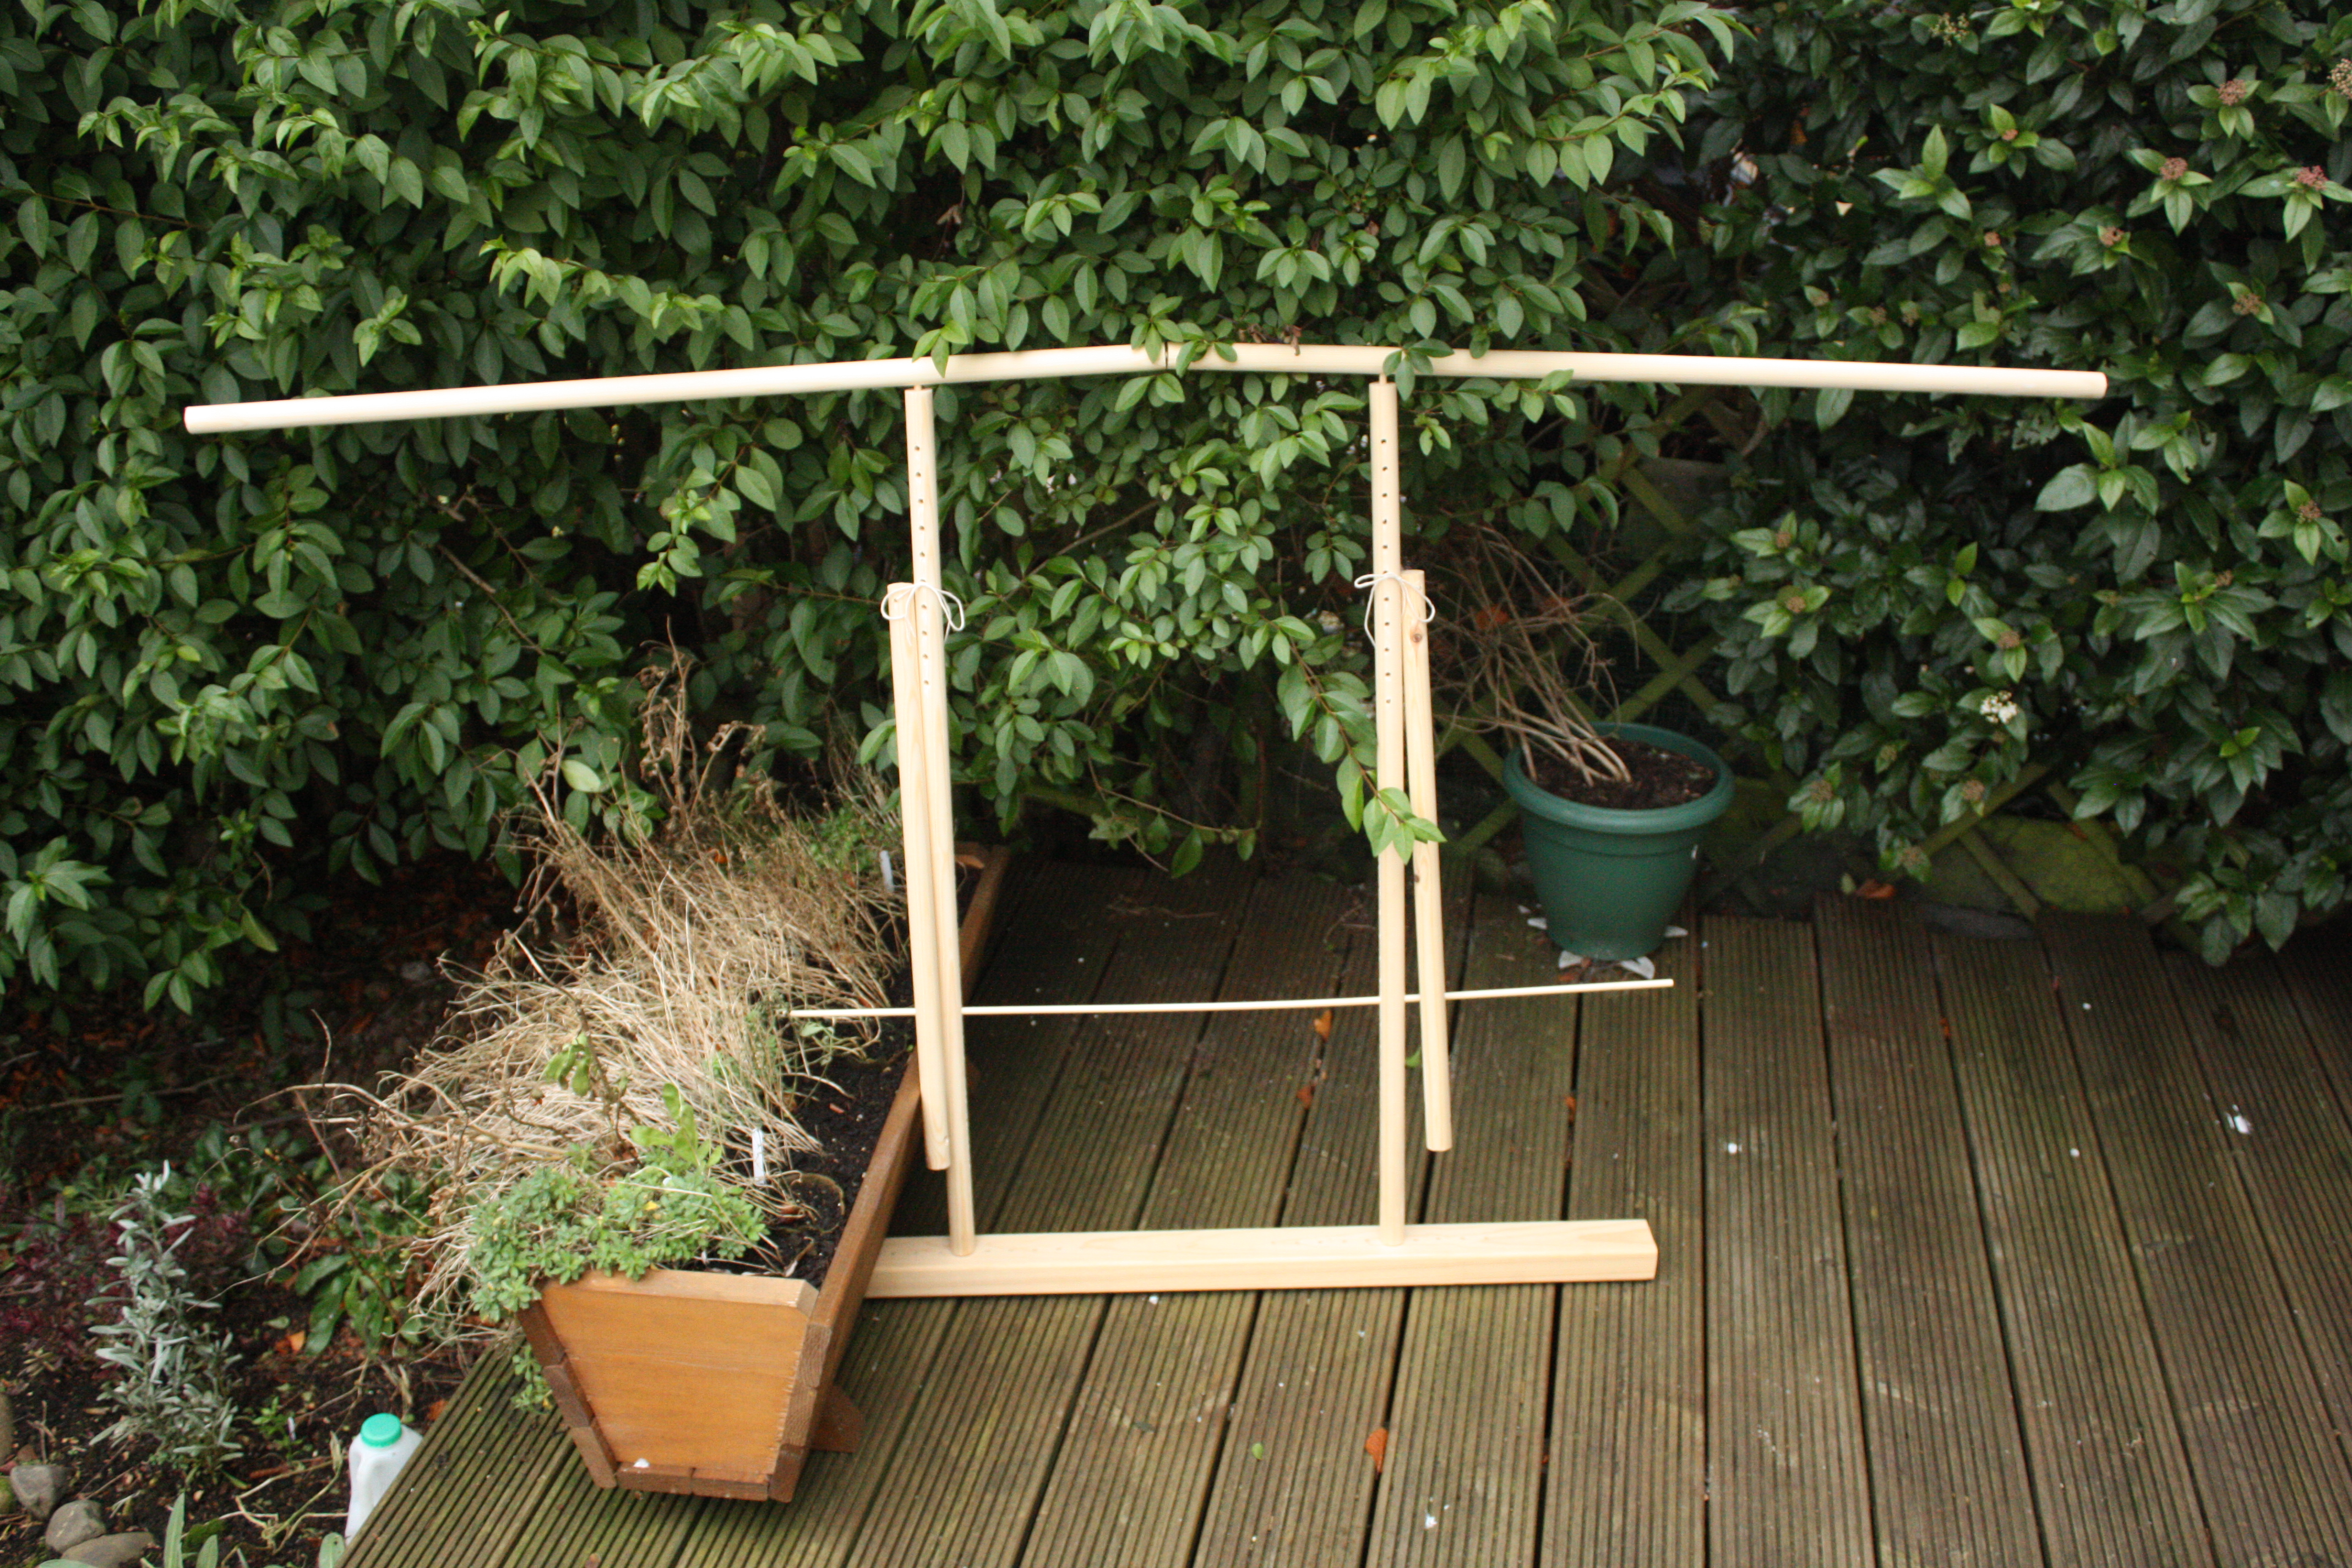
Assembly
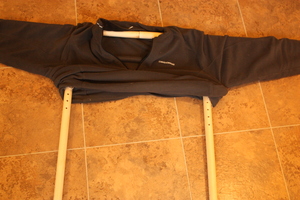
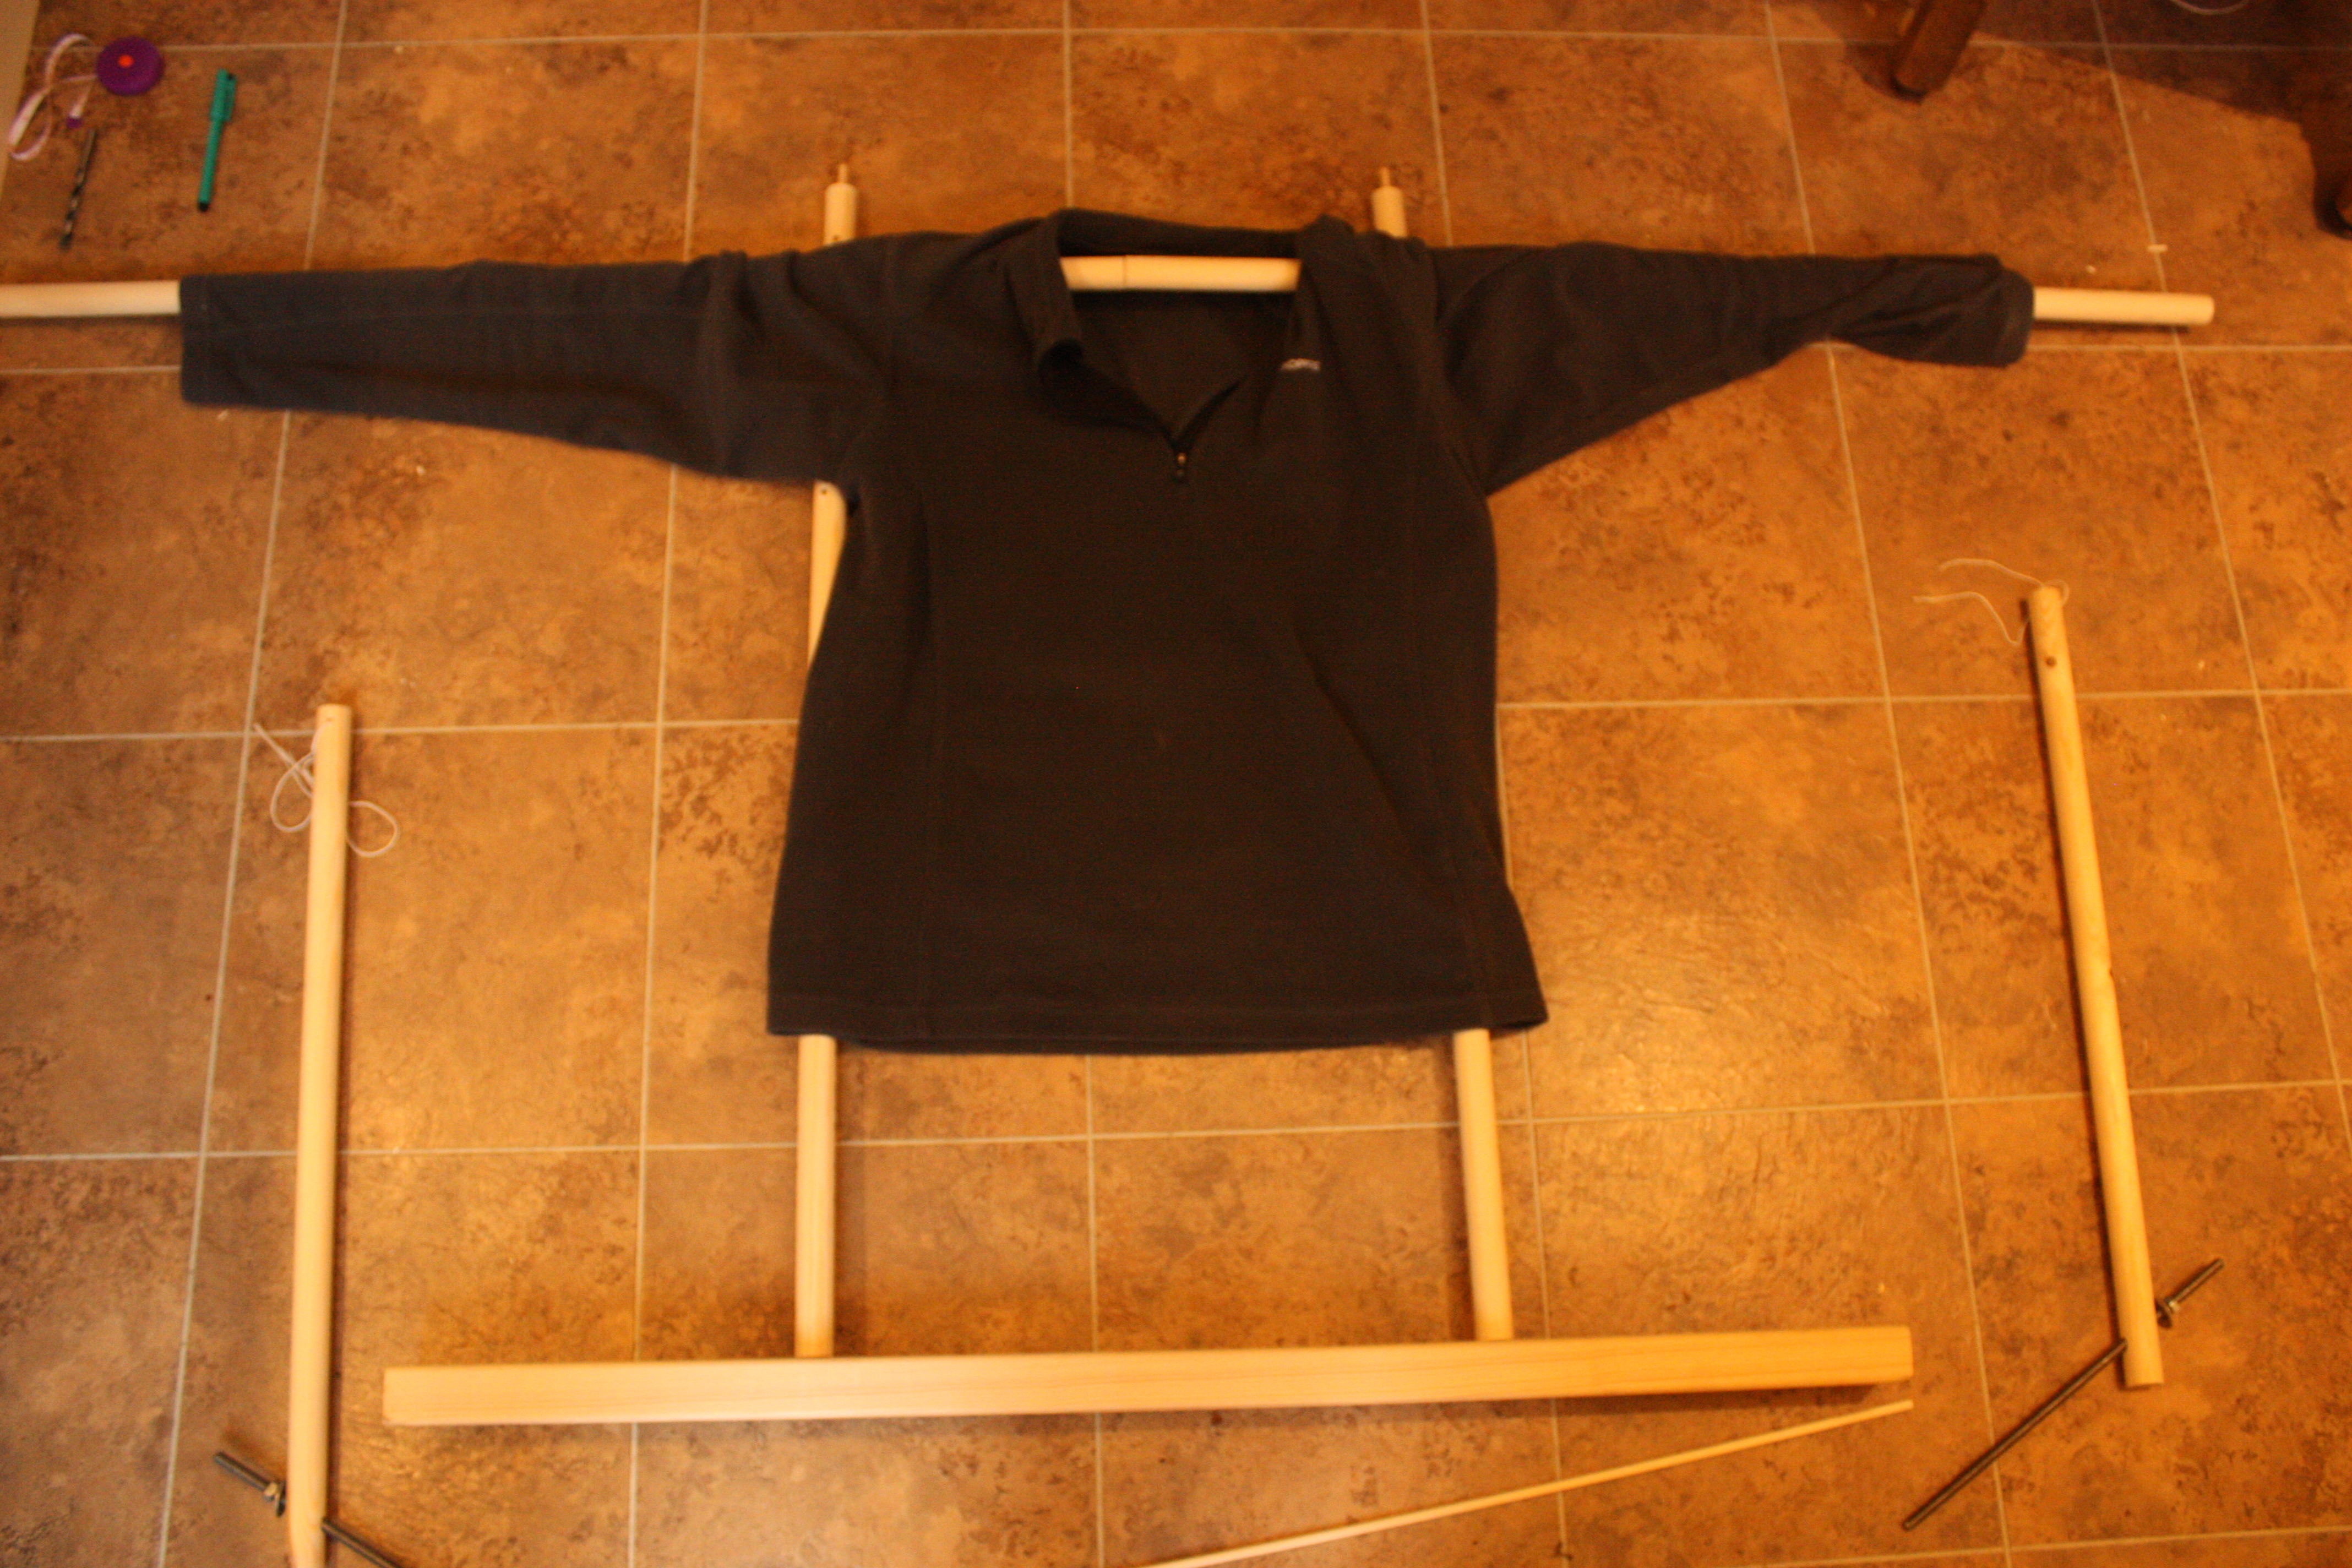
- It is easiest to assemble the woolly board on a flat surface, inserting it into the sweater, then standing it up once assembled. Start with the sweater laid down, arms stretched out, and the body rolled up to ijust below the armholes, to make it as short as possible.
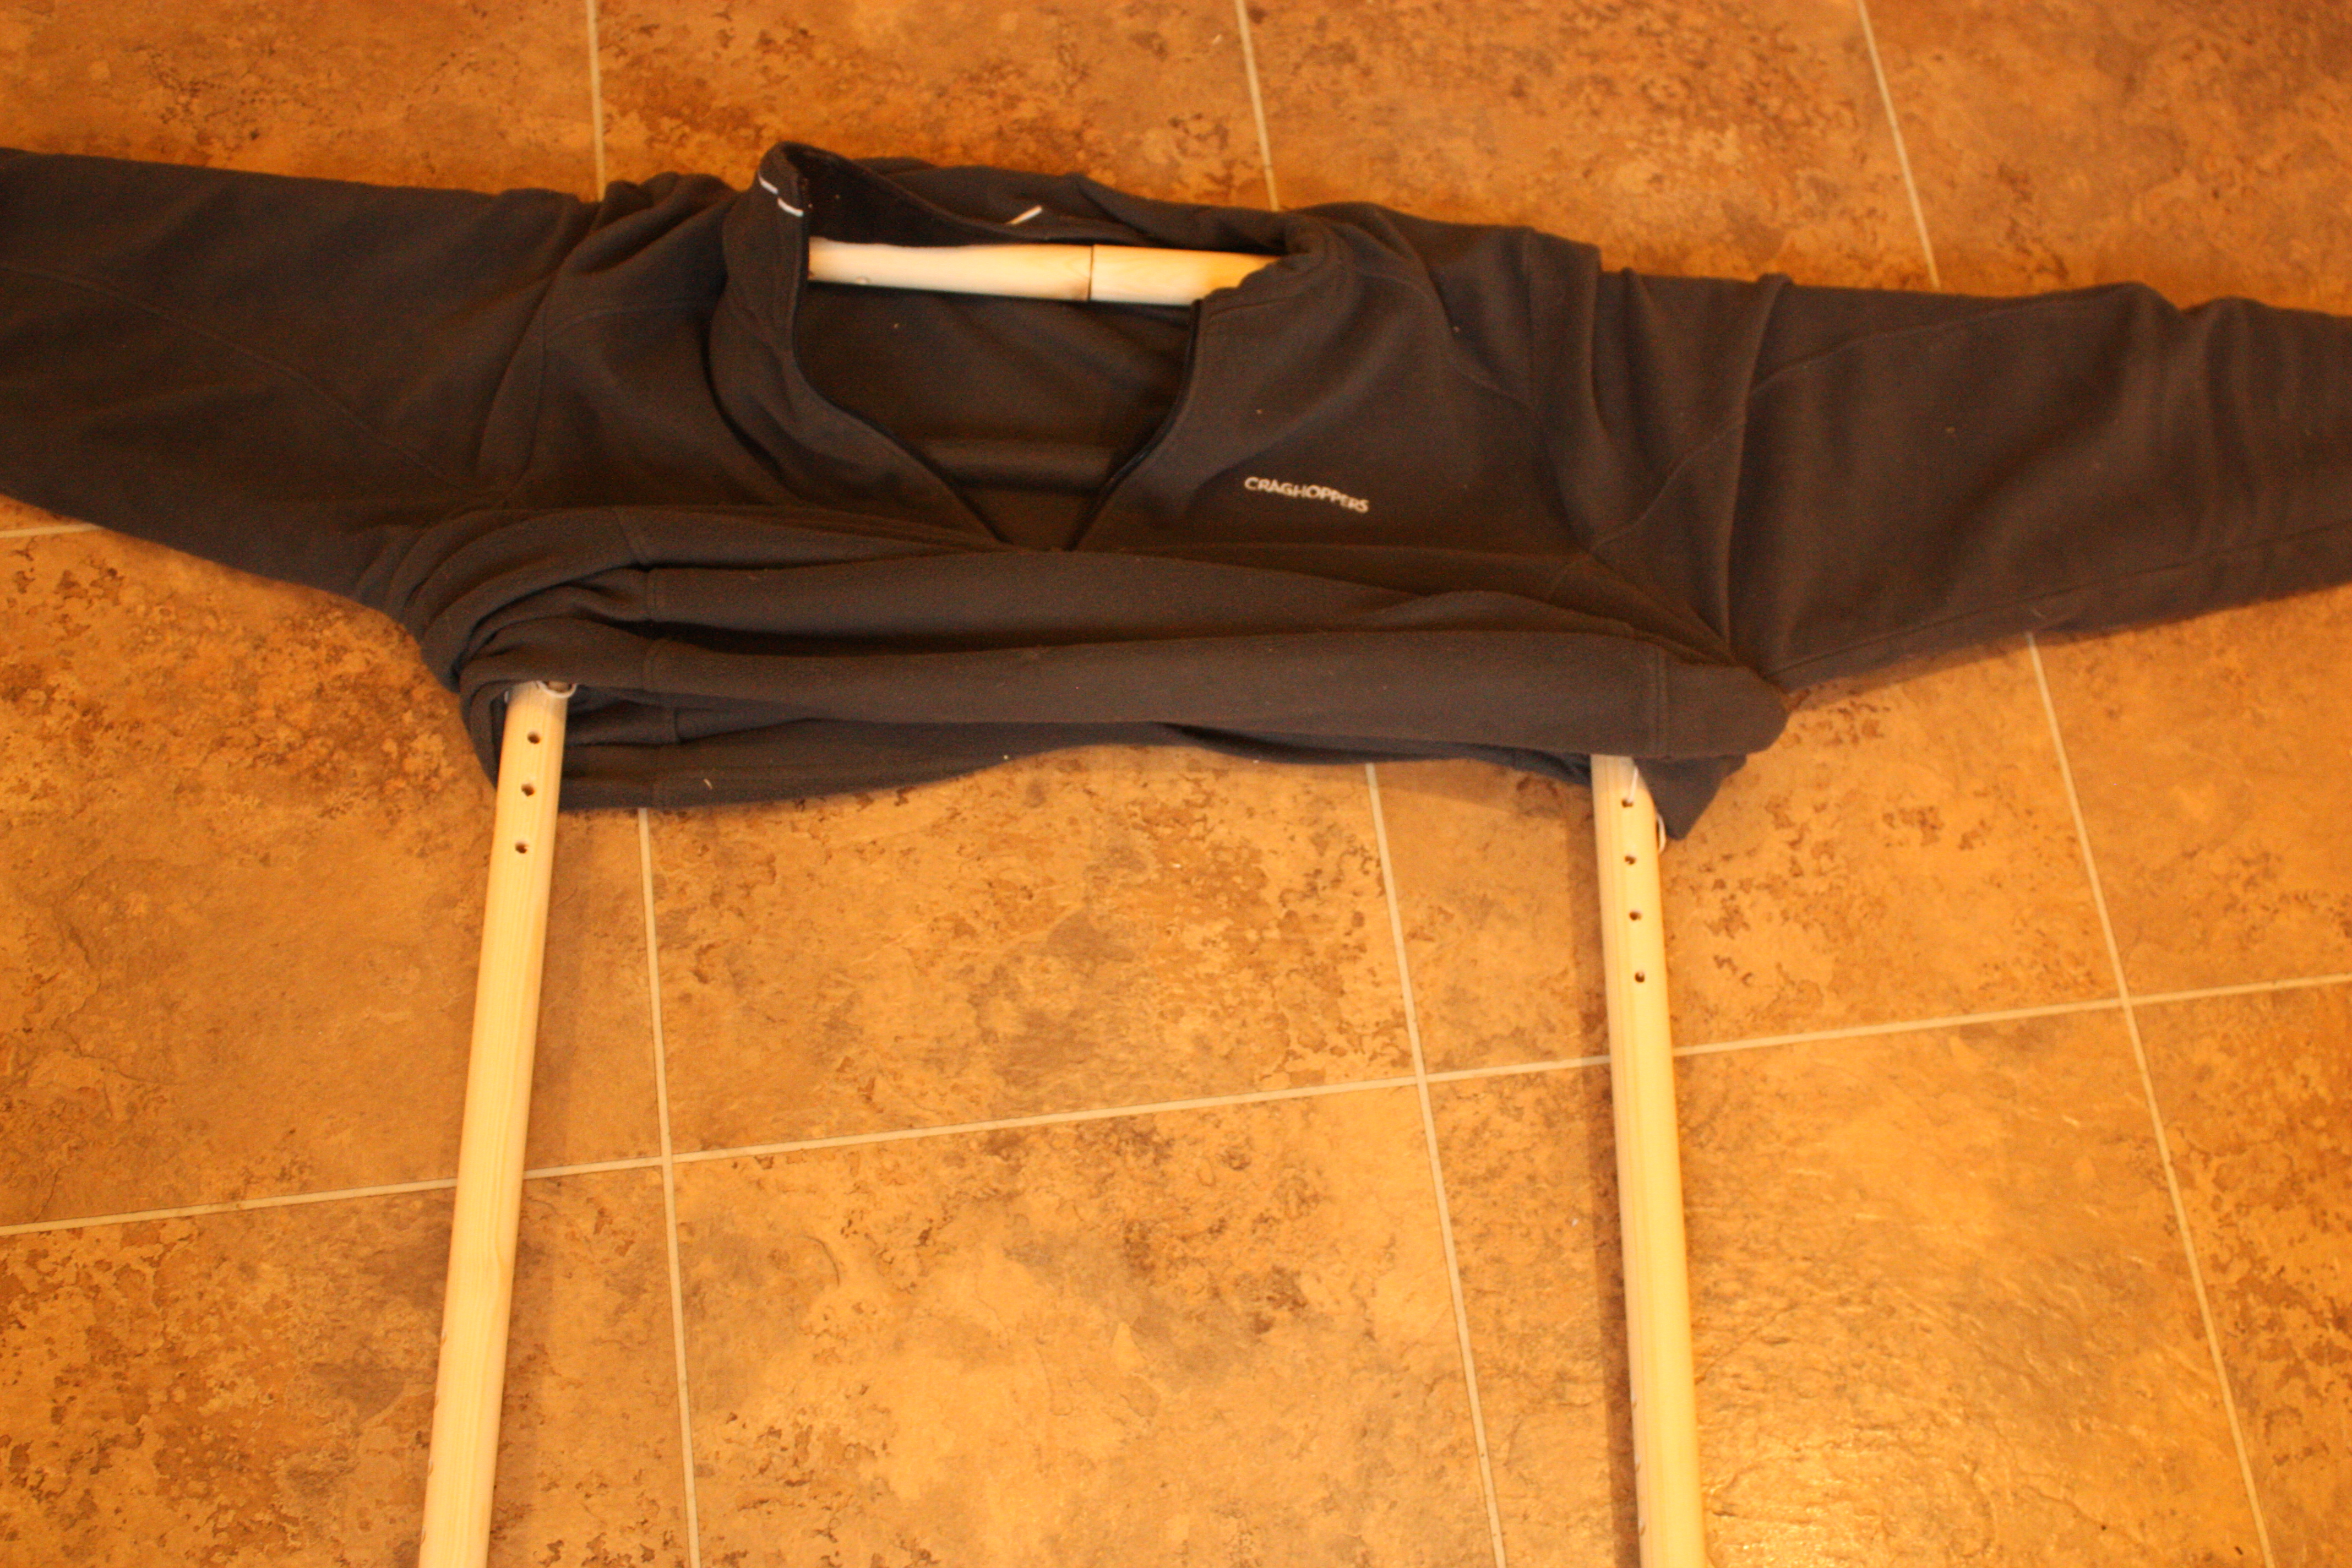
- Thread the upper arm bars through the sleeves of your sweater, joining with a doweli peg in the middle, centred on the middle of the neck hole..

- Insert the uprights into the body of the jumper, pushing out to gently stretch the garment sides, and pin to the upper arm bar at an appropriate point.
- Insert the lower arm bars into the sleeves, and tie/wire to the uprights at an appropriate point, so that the lower bar rests at the bottom of the sleeve/armhole.
- Unroll the sweater, and pin the uprights to the base, spaced the same number as holes as on the upper arm bars. Stand the woolly board upright.
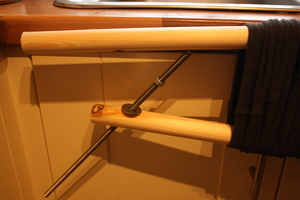
- Gently push the lower arm bars down at the wrist to tension the sleeves. Slot the bolt into the notch on the upper arm bar, and let the washer fall down onto the top of the lower arm bar. The washer should jam on the thread, stopping the lower bar from springing back up against the sleeve tension.
- Thread the thin rod through the lower holes on the uprights just below the body cuff, and pin or tie the body cuff to the bar to achieve appropriate tension.
- To release the lower arm bars, simply pull down gently on the bar and slide up the washer to release.

This first attempt came out a bit rough and ready, and if I was making another one I’d take more care about lining up the holes, drilling the correct number, and generally polishing it up a bit. (Those with keen eyes will notice I drilled 11 holes in one upright!). You might also need to play about with the exact positioning of the tension bolt holes and notches, depending on the exact angle you drill at. However, the design is fully functional, and I look forward to blocking my next sweater on it!
