This post is an update of a tutorial I wrote ages ago for the Bushcraft UK forums.
Tools
you will need a bodkin - or a long nail, awl or other pointed tool, and some secateurs.
Weaving Material
Begin by selecting around 50 rods of pliable, weaving material - here I have used 5ft, buff willow rods from a willow supplier, soaked then mellowed, but any hedgerow material which has been clung can be used. Its a good idea to keep any mellowing materials wrapped in damp towels to prevent them drying out too much before you use them.
Making the Basket
The Base
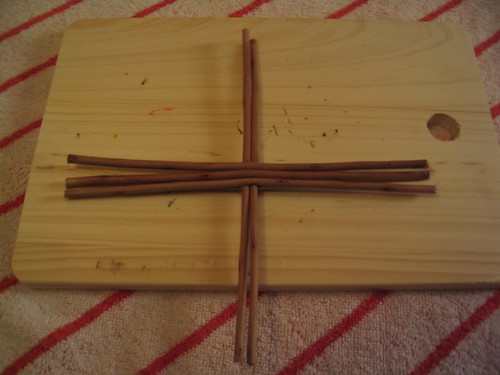
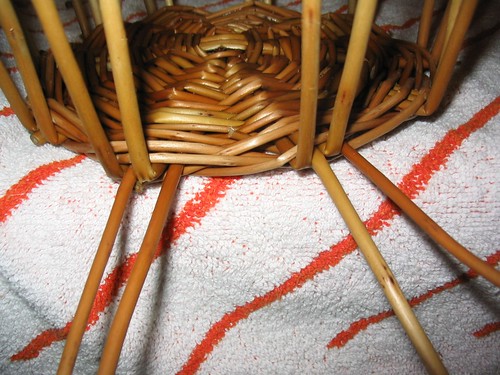
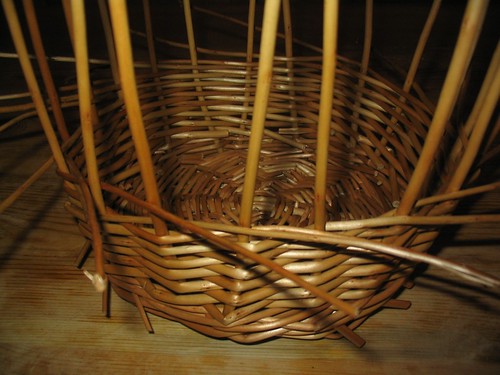
Select 6 thicker rods. Trim these to slightly longer than the desired diameter of your basket’s base. Start by pushing the bodkin through the centre of 3 of the rods.
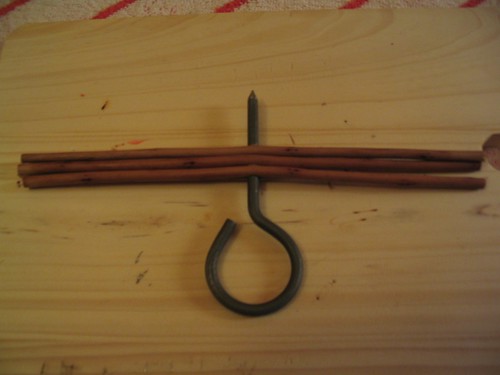
Next feed 2 or 3 other rods through this gap to make a cross-shape - this frame is known as the slath.
Next, take 2 weavers (thin rods) and tuck the thin ends in to the cut alongside the ones you pushed through above. Take one behind a set of 3 spokes, and one in front, and cross them at the gap, taking the front one behind and the back one in front - this is known as pairing.

Rotate the cross 90 degrees and repeat. You should go round the whole cross twice.
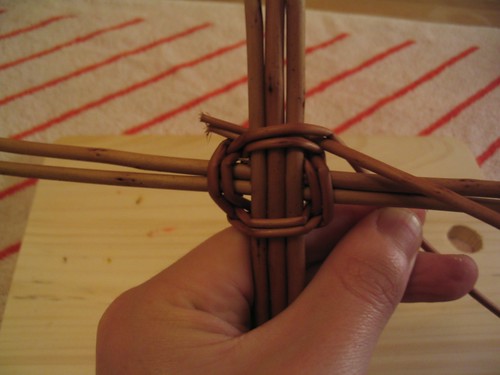
Once more, rotate the slath so that the weavers are on the left. Bend the left-most slath spoke of the upwards-pointing arm of the cross out to the left, and the right-most spoke out to the right. Weave the weavers in-between each spoke, rather than round all 3 as before. Repeat for the remaining 3 arms.
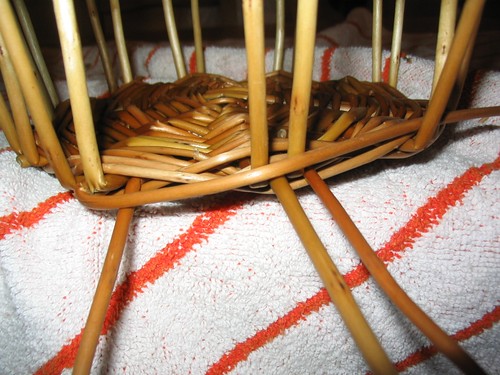
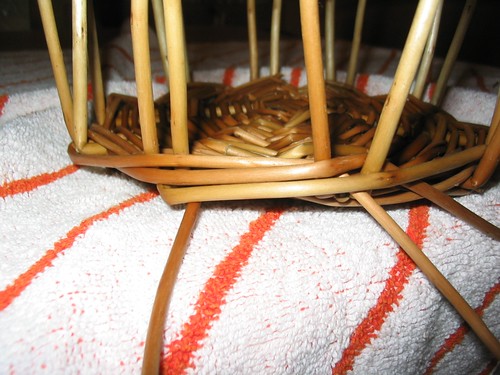
At this point you should now have a ‘spider’ of spokes. Keep pairing round each spoke, adding in new weavers as necessary (always matching thin end to thin, and thick end to thick). If necessary, overlap for a while when using thin strands so your overall weaver thickness remains constant. Continue going round until your base is large enough, finishing with thin ends. Tuck these back into the edge of the base.
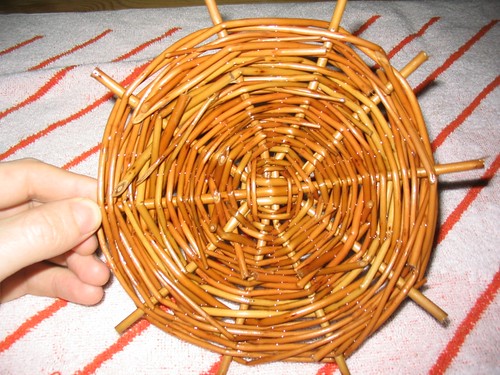
Looking at your base, it will naturally curve slightly one way or the other. The inside of the basket should curve up slightly - this allows the basket to sit flat on the ground, rather than rolling, which would happen if the base curved downwards. Be sure to rotate your base before working on the sides to reflect this!
The Side Spokes
The next stage in the process is to add the side spokes to the basket - these are variously known as spokes, staves or uprights. You will need twice as many spokes as you had spokes in the base, and in a simple basket their length determines the height of the basket - though it is possible to insert new uprights as you go on. Before you start on the uprights, trim off each base spoke flush with the woven edge of the base.
Cut the thick end of a side spoke at an angle. Push the greased bodkin into the base at one side of a base spoke, then insert a side spoke into the gap - pushing it in firmly. Do the same on the other side of the base spoke, so each base spoke has two side spokes coming out from it.
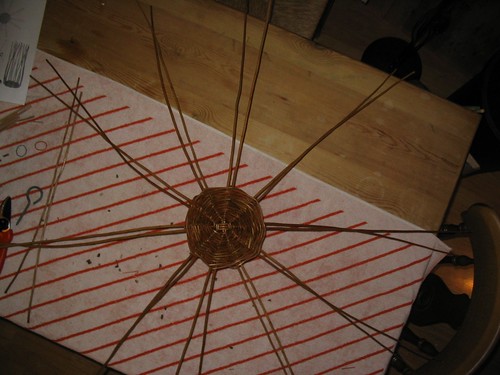
You will now need to bend up the spokes - this is called ‘pricking up’. Take the bodkin, and push on the spoke close to the edge of the base, then bend the spoke up - it should crease and bend easily.
Once all the side spokes are upright, loop over some string to stop them getting in the way. It also helps to mark off the top of one of the spokes to show the ‘start’ so that you can keep track of the basket’s progression as you rotate it.

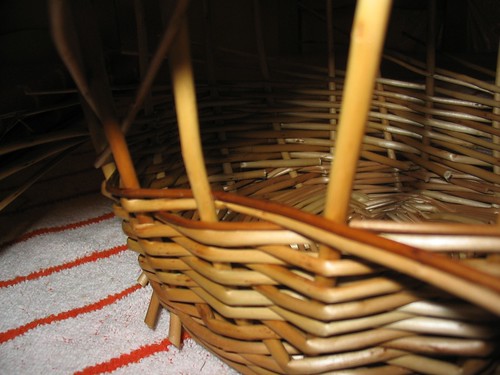
Upsetting
Upsetting is the name given to the initial few rows of weaving around the side spokes to reinforce them in their upright position. The weave used for this is known as a wale, and can be done with 3, 4 or more rods.
4-Rod Wale
To begin, insert 4 weavers thick-end first into the base, to the right of 4 spokes (you might need the bodkin again). Bend these down slightly.
Take the first weaver, bend it to the right, over the other three weavers, and take it in front of 3 spokes, then behind one, ending by bending it downwards.
Repeat with the next weaver, going over the 3 weavers ahead of it.
Continue around the basket, repeating this weave, pushing down well to ensure a neat edge. You may need to add new weavers, in which case, add these in alongside the current weavers, if necessary weaving with both for a short while. You should do at least 2 full rotations of the basket, to lock everything in position.
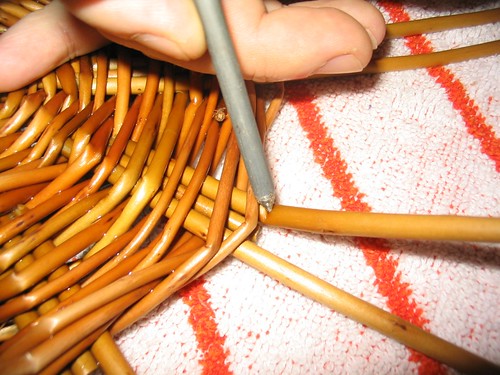
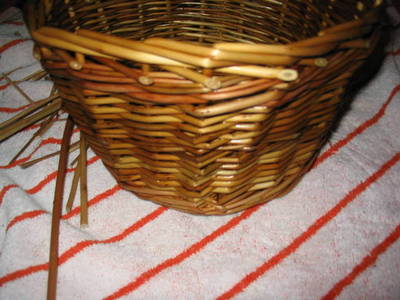
3-Rod Wale
This is the same as the previous technique, but using 3 rods instead of 4, and crossing in front of 2 spokes, then behind one. Start by tucking the end of the weavers in behind 3 spokes, then begin weaving to the right as usual. Continue again for 2 or three full rotations of the basket.
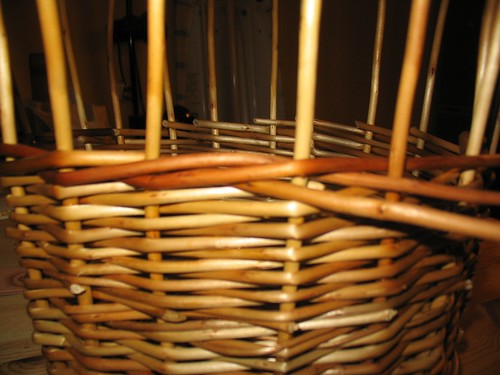
(This photo shows 3-rod waling in the middle of the basket, as a decorative or reinforcing weave - but the weaving principle is the same when done at the base).
Randing
There are many types of randing, which means weaving with one weaver at a time. The variation shown here involves weaving all the weavers at once, a bit at a time. Its quick and easy to build the basket up evenly. The other common method involves only weaving one weaver at a time to completion.
Take 2 less weavers than the number of spokes you have - thus for 20 spokes, use 18 weavers. Tuck one weaver in behind a spoke, then take it in front of one to the right, then behind one, then back to the front. Turn the basket one spoke to the left, and do the same behind the next spoke. Repeat all the way round.
You should now have 2 spokes to your left which have no weavers starting behind them.
Take the next weaver to the left, and repeat the out-in-out weave once, which should make the gap move ‘left’. Keep doing this round and round the basket and you should begin to gain height. When your weavers are used up, insert all new ones and continue.
It is important throughout to keep the side spokes evenly spaced and pointing vertically upwards.
Another option is to double up on the number of rods inserted in the randing process - this double randing results in a slightly different pattern, but speeds up the rate at which the basket gains height. Using more than one weaver at once is known as slewing.
3-Rod Wale Again
To give the basket some strength at the top, return to the 3 rod wale as before, going round for 2 or 3 rotations (see earlier photo). This also gives a nice border to the basket top. If you’re making a tall basket, you can change to waling weaves at any time inbetween randing to give bands of different pattern around the middle of the basket.
Edge Border
One of the simplest borders to finish off a basket is called a trac border. This is the same weave as the 3-rod wale, but is done with the side spokes. Firstly, prick a spoke about a spokes-width above the edge formed by the waling, and bend it to the right. Take this spoke in front of two spokes, then behind one and back to the front again. Repeat with the next spoke to the right, bending it over on top of the previous woven spoke, locking it in position. Be sure to always prick at the same height above the original waling, to stop the basket edge creeping up. Go all the way around in this manner. When you get to the last 3 upright spokes, you will need to tuck these in under the already woven in first 3 spokes, finishing off the edge.
Finishing Off
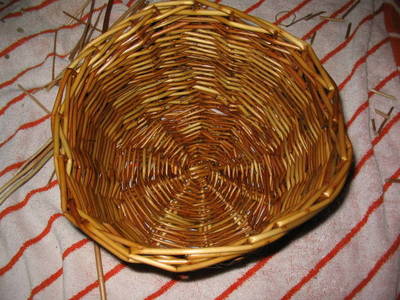
Trim all the remaining loose ends (known as picking off), tucking in any that look loose. If your basket isn’t quite the right shape, you can soak the whole basket and pull and push the sides to make it a better shape. You should now have a finished basket!